In modern industrial automation and Industrial IoT environments, remote monitoring and control of devices have become increasingly important. Engineers often need an efficient way to collect device data, monitor system status, and control equipment through network-based platforms.

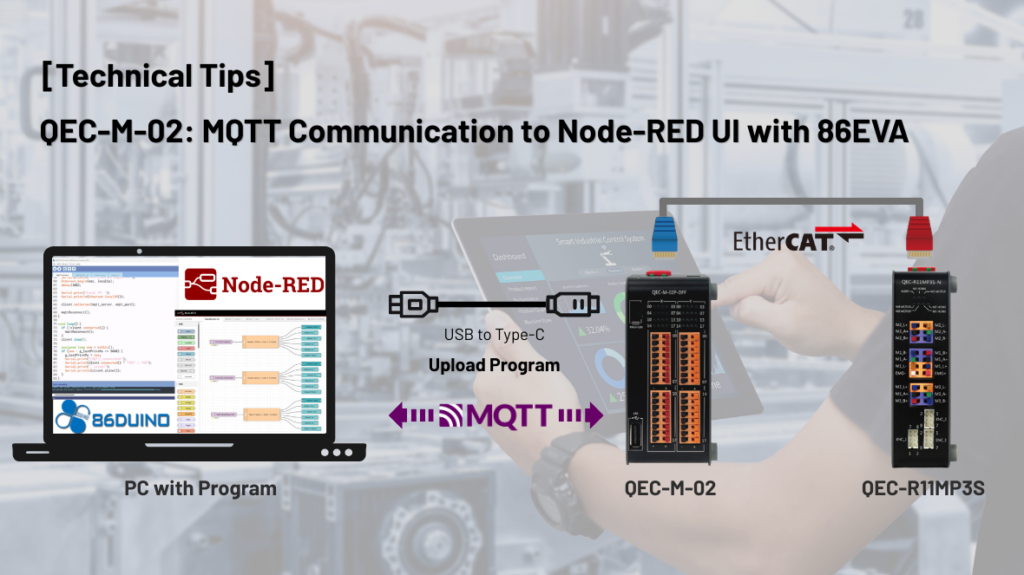
In this start guide, we demonstrate how to use the QEC-M-02 together with the QEC-R11MP3S-N to communicate with an MQTT broker and visualize device data through a Node-RED dashboard.
Advantages of the Start Guides
- Complete environment setup
Instructions for installing the required tools, including the 86Duino IDE, MQTT broker, and Node-RED. - Example programs
Sample code demonstrating MQTT communication, motor control, digital I/O control, and device monitoring. - Node-RED dashboard integration
A ready-to-use Node-RED UI dashboard for visualizing device data through a web interface. - Troubleshooting
Common issues and solutions to help users quickly resolve development problems.
Start Using QEC-M-02 with MQTT and Node-RED UI
Before using the example programs and dashboard flow, please make sure Mosquitto and Node-RED have been installed correctly. If the environment is not ready yet, you can continue reading the following sections of this page for the setup instructions.
Click the links below to explore the available guides:
- Start Guides :
QEC-M-02 MQTT Communication to Node-RED UI with 86EVA - Download 86Duino Example Programs :
1.QEC-MQTT-Connection
2.QEC-MQTT-MotorControl
3.QEC-MQTT-IOControl
4.QEC-MQTT-DeviceStatus - Download Node-RED UI Flow JSON :
1.QEC-MQTT-Connection.json
2.QEC-MQTT-MotorControl.json
3.QEC-MQTT-IOControl.json
4.QEC-MQTT-DeviceStatus.json
How to install Mosquitto Broker
This section describes the steps required to install the Mosquitto MQTT broker on Windows 11.
The broker provides the messaging service required for MQTT communication between devices, Node-RED, and other MQTT clients.
If MQTT broker is already installed and running in your environment, this section may be skipped.
Step 1: Download Mosquitto
Download Mosquitto from https://mosquitto.org/download/

Step 2: Run Mosquitto install
Run the installer and follow the installation wizard.
The default installation path is usually: C:\Program Files\mosquitto

Step 3: Start Mosquitto Broker
Open Command Prompt as an administrator and run: cd “C:\Program Files\mosquitto”

When the terminal is in the Mosquitto directory, run: mosquitto -v
If you see the following output in the terminal, Mosquitto has started successfully.

Step 4: Start Node-RED
Open Command Prompt and run: node-red
 When Node-RED starts successfully, you will see a page like the one below.
You should see: Server now running at http://127.0.0.1:1880/

Step 5: Open Node-RED Editor
Open your browser and go to: http://127.0.0.1:1880/ The Node-RED editor interface will appear.

Step 6: Install Nodes in Node-RED
After successfully opening the Node-RED Editor in your browser, you need to install the MQTT and Dashboard packages.
1.Click the Menu (☰) in the top-right corner of the Node-RED Editor, and select Manage palette.

2.Go to the Install tab, and Search for: mqtt

3.Find the package node-red-iot-mqtt-api and click Install.

4.After installing the MQTT package, if you want to use the Node-RED UI, you need to install the Dashboard and UI packages.

Step7: Import Node-RED Flow (JSON)
When you have a Node-RED UI flow JSON file (such as a sample flow generated by AI), you can import it into Node-RED by following the steps below.
1.Open the Node-RED editor in your browser.
2.Click the menu button (☰) in the top-right corner and Select Import from the menu.
 3.Paste the JSON flow content into the import window or upload the JSON file.

4.Click Import to add the flow to your workspace.
 5.Click Deploy to apply the changes.

6.Once deployed, the dashboard will be available at http://127.0.0.1:1880/ui.


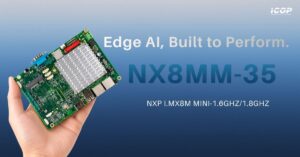
Featured Products QEC-M-02:
- Built-in 86Duino IDE for C/C++ programming with library support
- Dedicated core for real-time EtherCAT MDevice communication
- HDMI display (1280 x 720 x 256) with graphical library support
- 16-channel isolated digital input and 16-channel isolated digital output
- Operating temperature: -20°C to +70°C (optional -40°C to +85°C)
- Supports EtherCAT, Giga LAN, USB, COM, HDMI, Rotary switch, and RUN/STOP switch

Featured Products QEC-RXXMP3S:
- Support Drive Profile with CiA402 and G-code
- 3 stepper motors (2-phase bipolar stepper motor)
- Drive current up to 4.5A, peak 5.0A (Adjustable by Switch)
- Encoder interfaces (A, B, Z), differential
- Automatic current reduction when the motor is not moving
- Internal Monitoring Hardware Information
- EtherCAT Conformance test tool verified
- Operating Temperature -20 to +70 °C
For more information or to request a sample, please email us at info@icop.com.tw, contact your nearest ICOP Branches, or get in touch with our Worldwide Official Distributor.

![eShop Article Banner_[Technical Tips] Getting Started with 86HMI Editor and ArduBlock Simple HMI Light Control Example](https://icop-shop.com/wp-content/uploads/2026/06/eShop-Article-Banner_Technical-Tips-Getting-Started-with-86HMI-Editor-and-ArduBlock-Simple-HMI-Light-Control-Example-300x201.png)