ICOP Technology 86HMI and ArduBlock Technical Tips

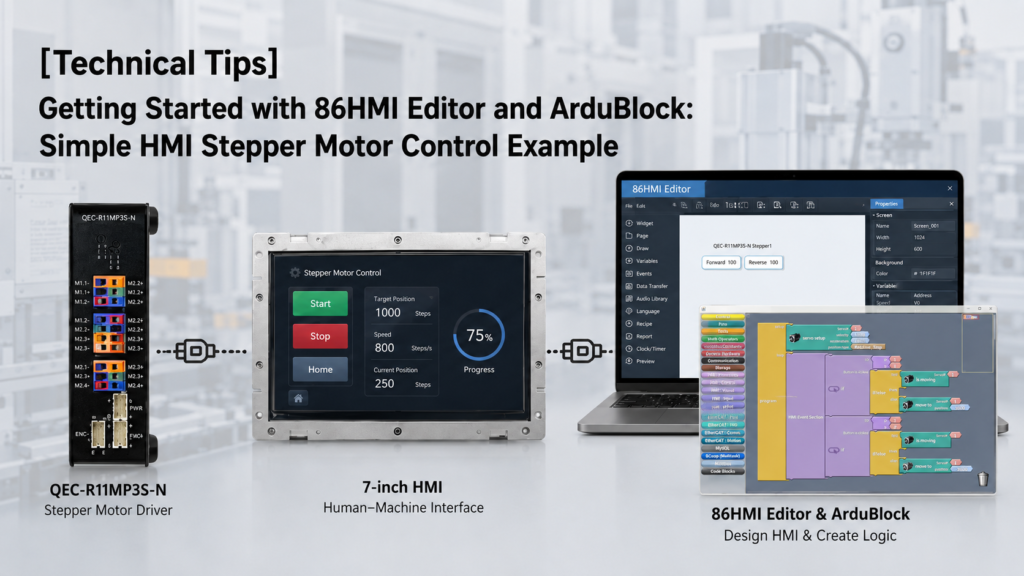
[Technical Tips] Getting Started with 86HMI Editor and ArduBlock: Simple HMI Stepper Motor Control Example

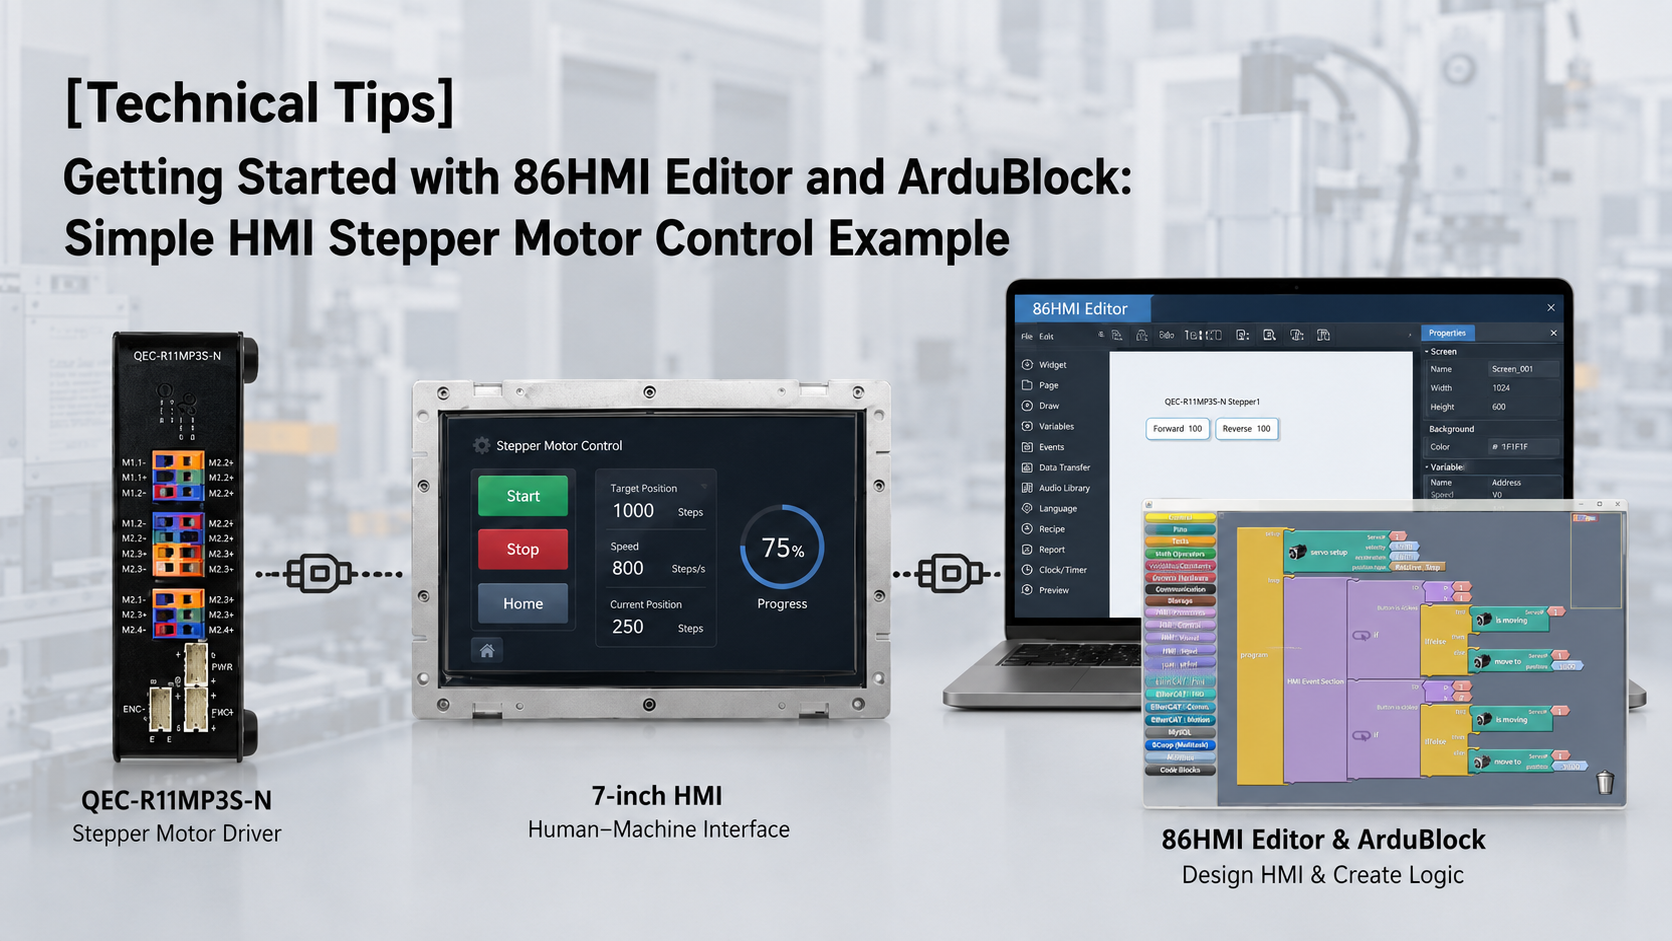
This example demonstrates how to quickly implement stepper motor control using the 86Duino platform — covering HMI button design with 86HMI Editor and drag-and-drop programming with ArduBlock.

Stepper Motor Control Example tips


86Duino IDE

要編譯並將控制程式上傳至 QEC 控制器,必須使用 86Duino IDE。86Duino IDE 提供了一個與 Arduino 相容的開發環境,可用於上傳由 ArduBlock 生成的程式,或使用標準 C/C++ 編寫的程式。
讀者可從 QEC 網站下載 86Duino IDE 的最新版本: 86Duino Coding IDE
對於初次使用本平台的用戶,我們也提供了一份逐步指南,協助您設定開發環境並開始進行第一個專案: 86Duino 入門指南

硬體設定

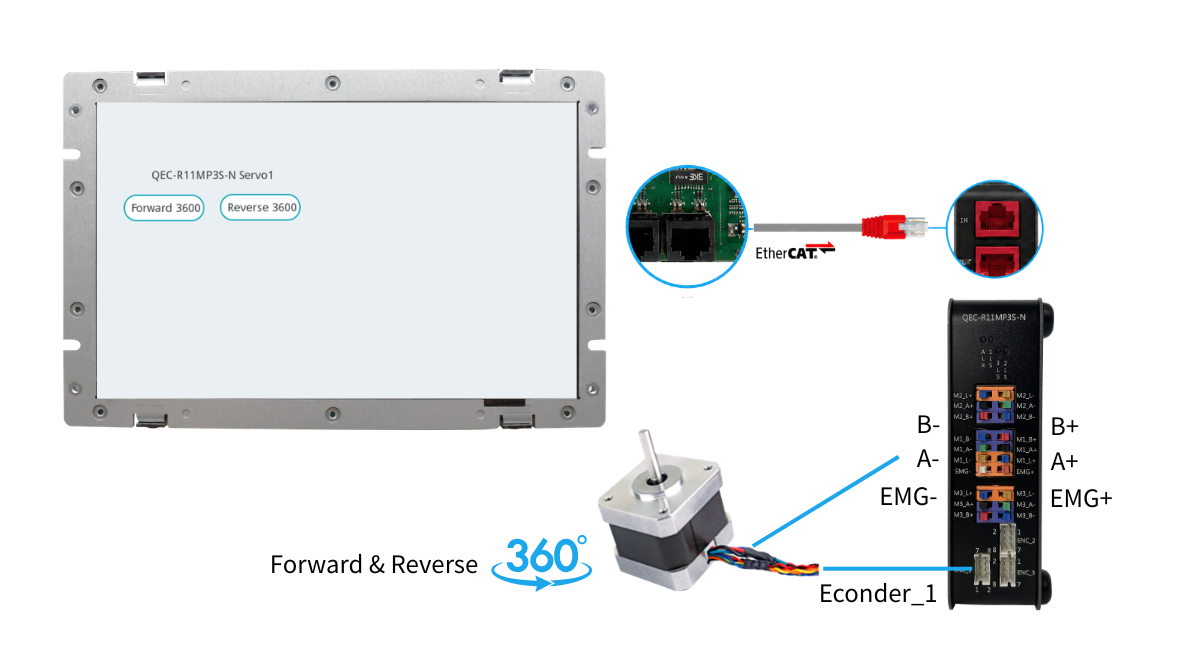
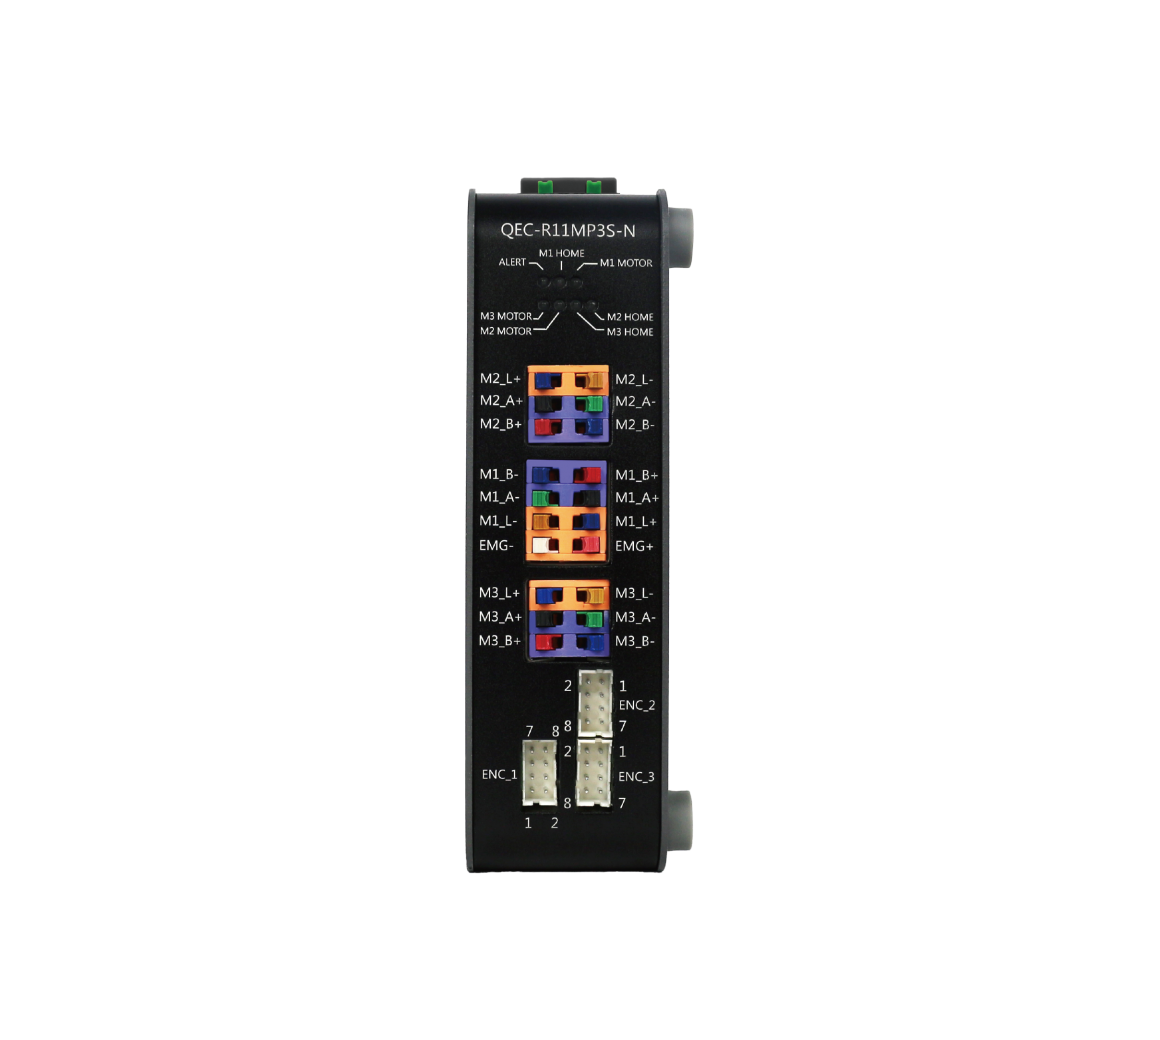
The hardware setup uses the QEC-M-070T as the EtherCAT MDevice controller and the QEC-R11MP3S-N as the SubDevice stepper motor driver:

  • QEC-M-070T – 用於介面設計與控制邏輯執行的 EtherCAT MDevice HMI 解決方案
  • QEC-R11MP3S-N – EtherCAT motion control with 3-axis Stepper Motor Controller
  • 24V 電源供應器
  • 乙太網路線(用於 EtherCAT 通訊)

實施步驟

The implementation process can be divided into three main steps.

  1. First, use 86EVA to scan and configure the EtherCAT devices. This step ensures that all connected EtherCAT slaves are correctly detected and properly configured.
  2. Next, design the HMI interface using 86HMI Editor. The interface can include buttons, text, and other visual elements required for motion control.
  3. Finally, create the control logic using ArduBlock. By combining the EtherCAT configuration and HMI interface, the function can be completed and operated through the HMI.


步驟 1 – 86EVA 配置工具

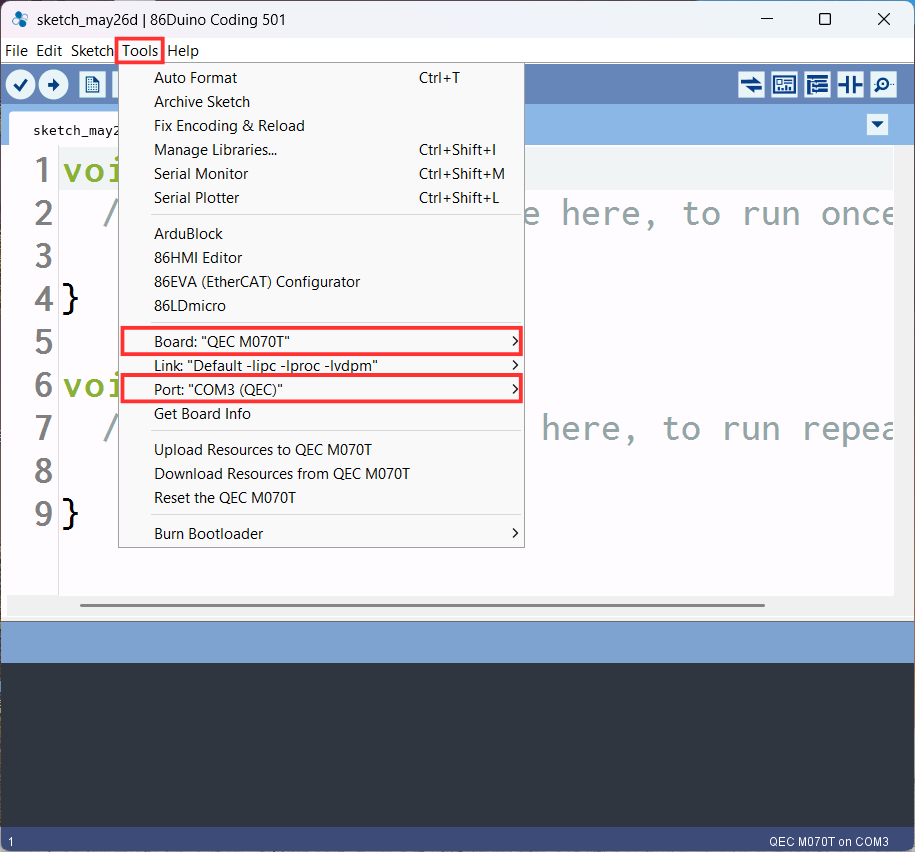
  1. Set up the development board and port to be used in tool option
    Stepper Motor Control Example tips_pic
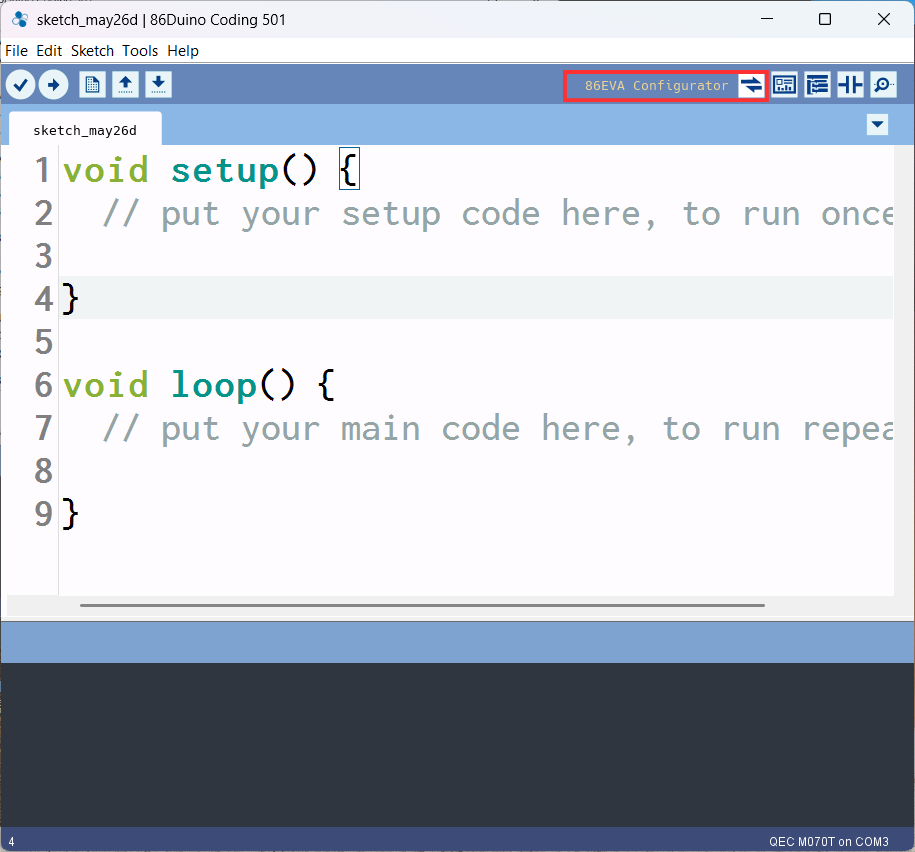
  2. 點擊 86EVA 設定工具
    Stepper Motor Control Example tips_pic
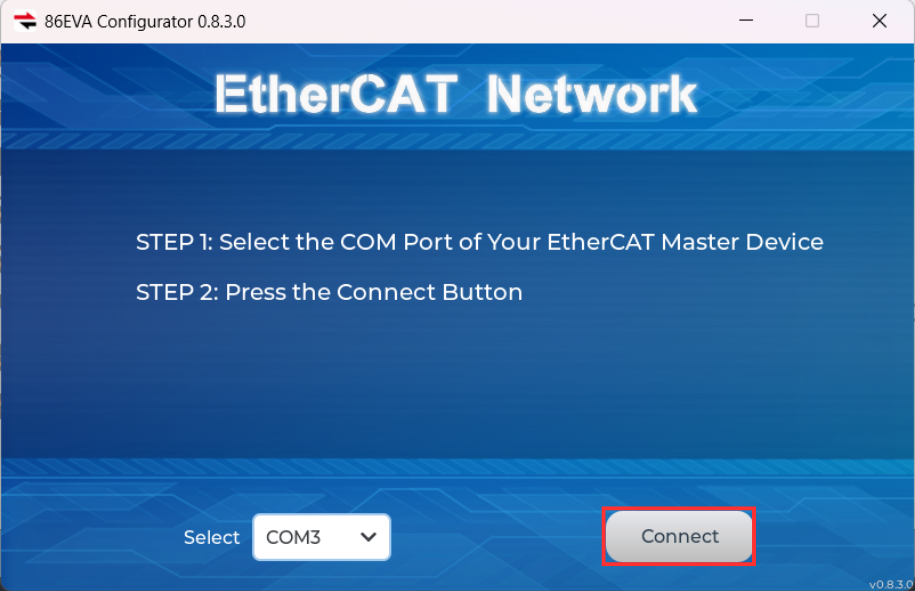
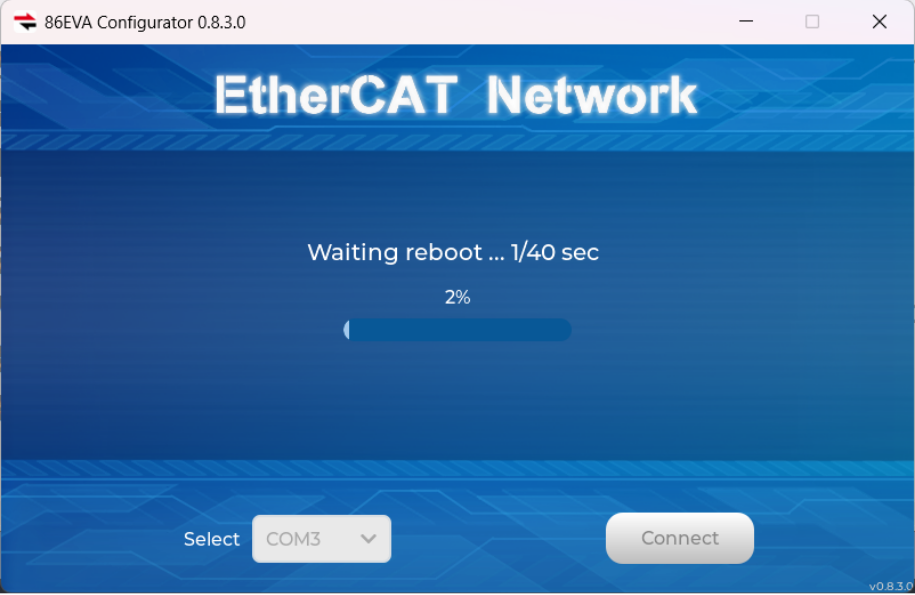
  3. 點擊以連線,並掃描該裝置
    Stepper Motor Control Example tips_pic
  4. Scanning Device
    Stepper Motor Control Example tips_pic
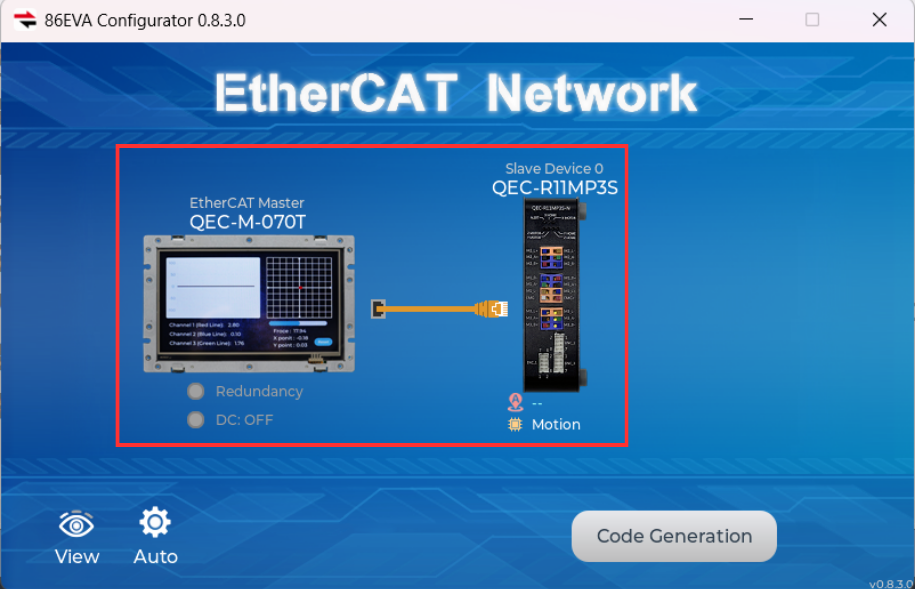
  5. Configure QEC-M-070T and QEC-R11MP3S-N devices in 86EVA network
    Stepper Motor Control Example tips_pic
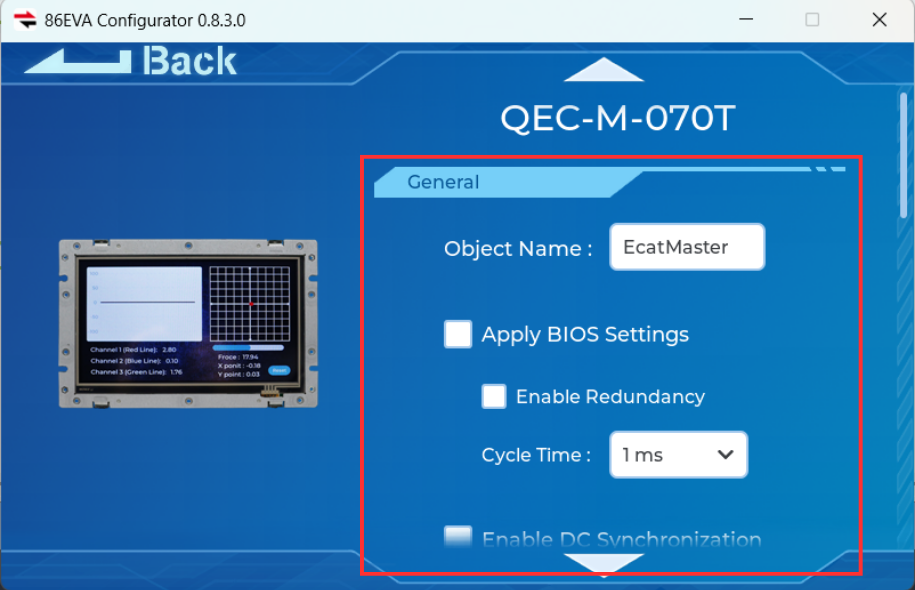
  6. Set up the QEC-M-070T Parameters (As shown in the illustration)
    Stepper Motor Control Example tips_pic
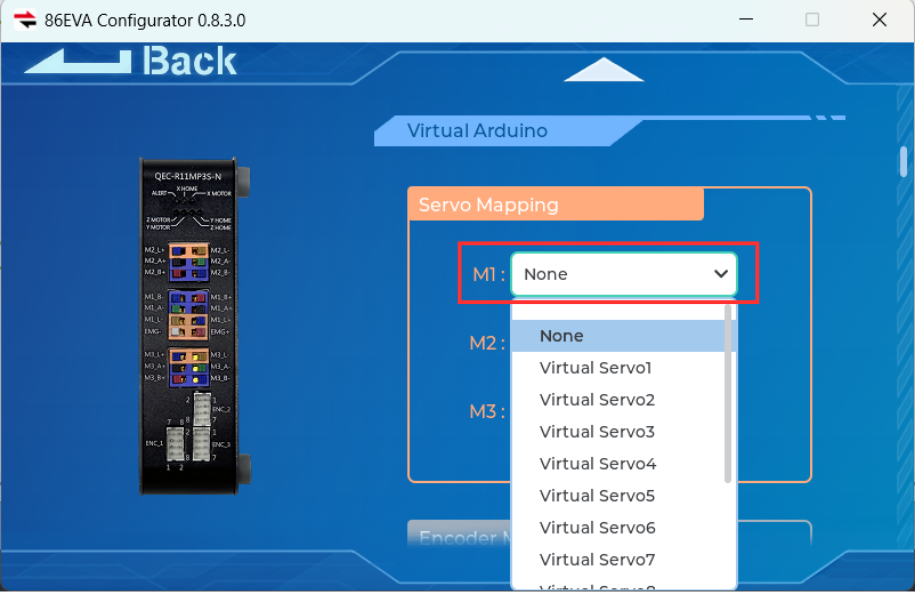
  7. Set up the QEC-R11MP3S-N M1 in the servo mapping
    Stepper Motor Control Example tips_pic
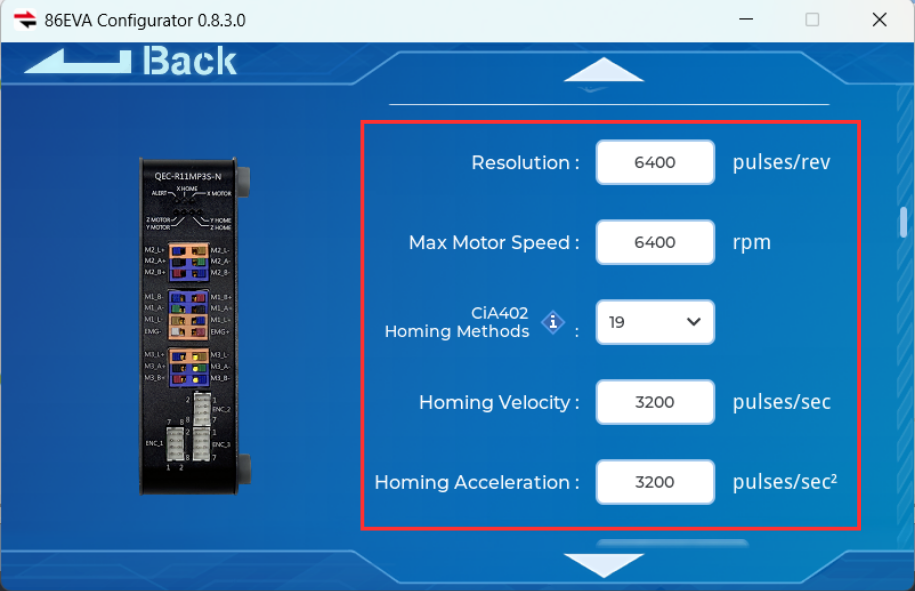
  8. Set up the servo 1 parameters (As shown in the illustration)
    Stepper Motor Control Example tips_pic
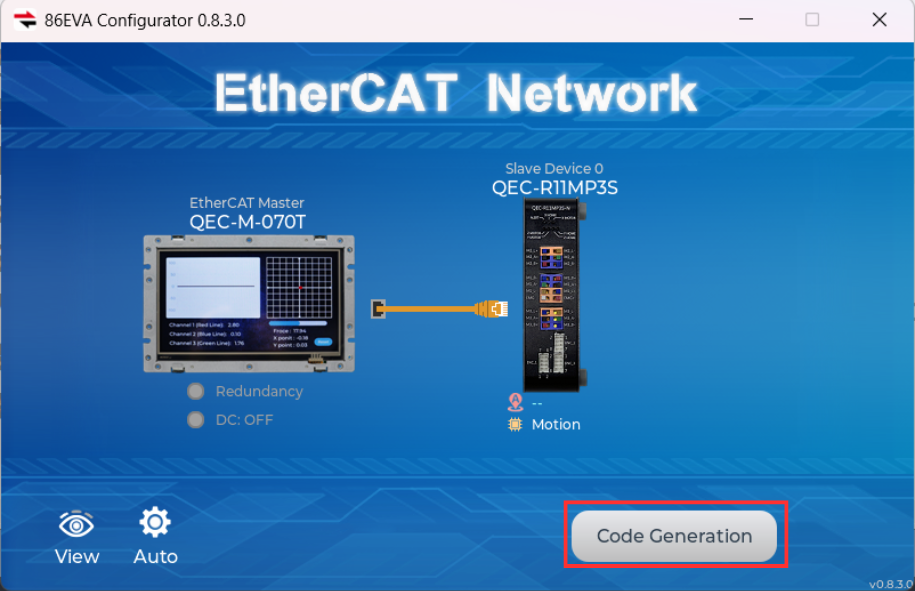
  9. Back to 86EVA to click Code Generation
    Stepper Motor Control Example tips_pic
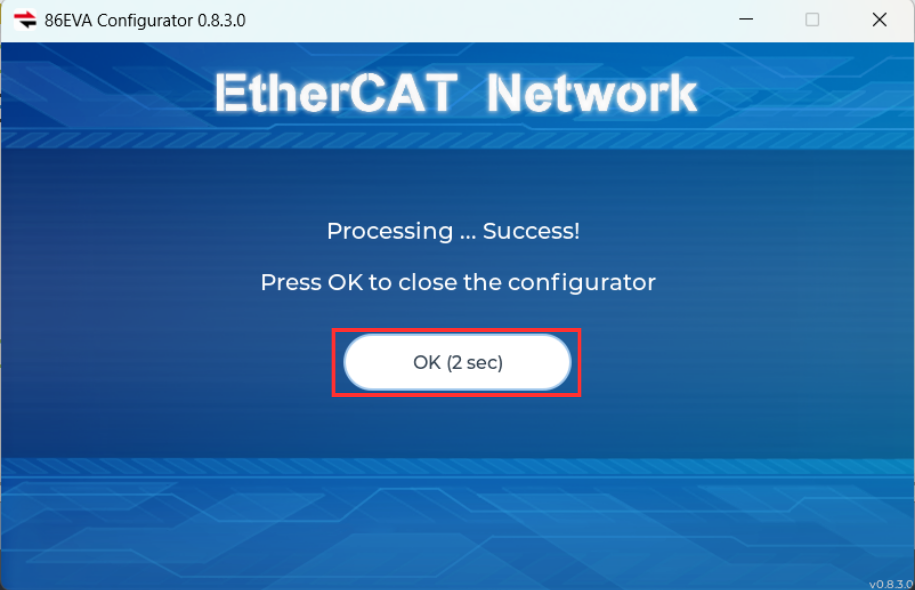
  10. Scanning is complete and click OK to confirm
    Stepper Motor Control Example tips_pic

步驟 2 – 86HMI 編輯器使用者介面設計

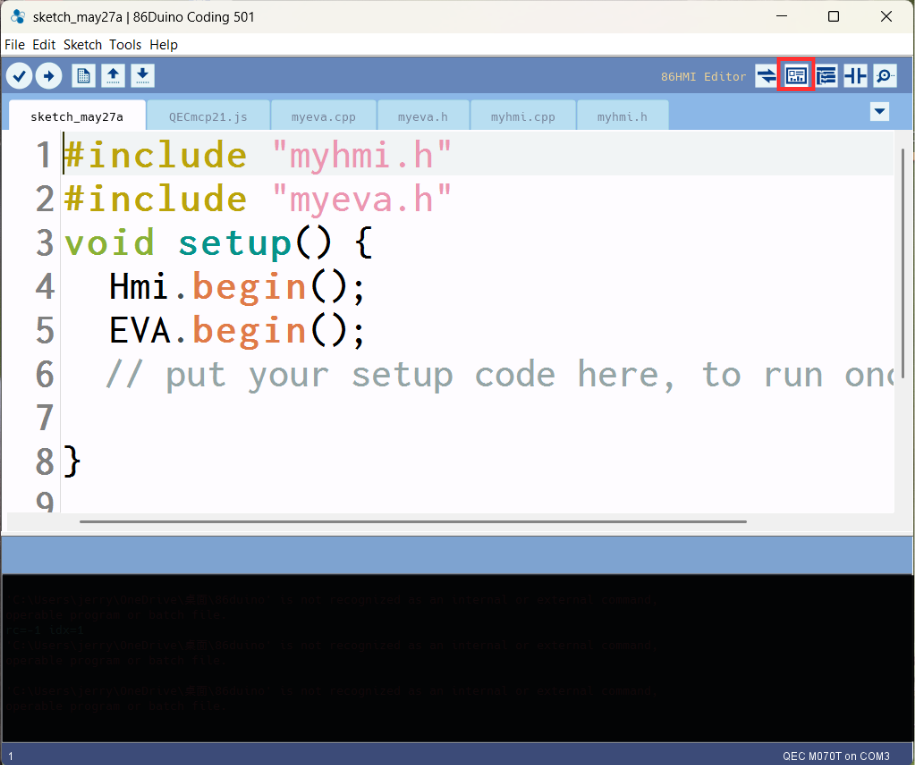
  1. 點擊 86HMI 編輯器工具
    Stepper Motor Control Example tips_pic
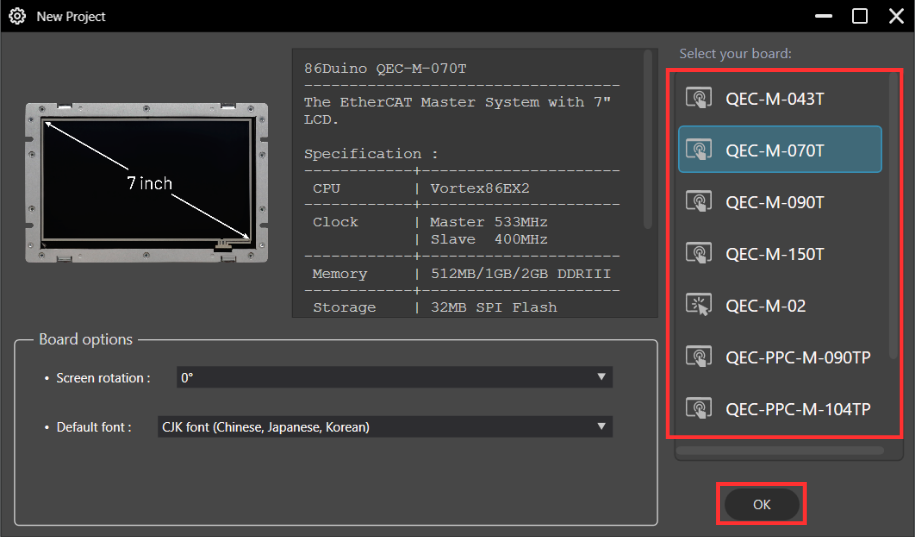
  2. Select the board and Click OK
    Stepper Motor Control Example tips_pic
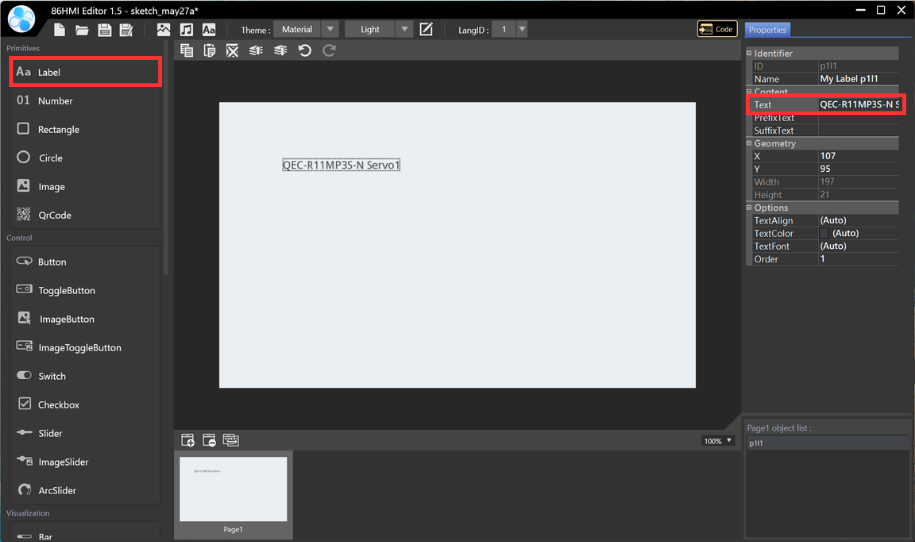
  3. Edit Text: Label > Text (Type the text inside the field)
    Stepper Motor Control Example tips_pic
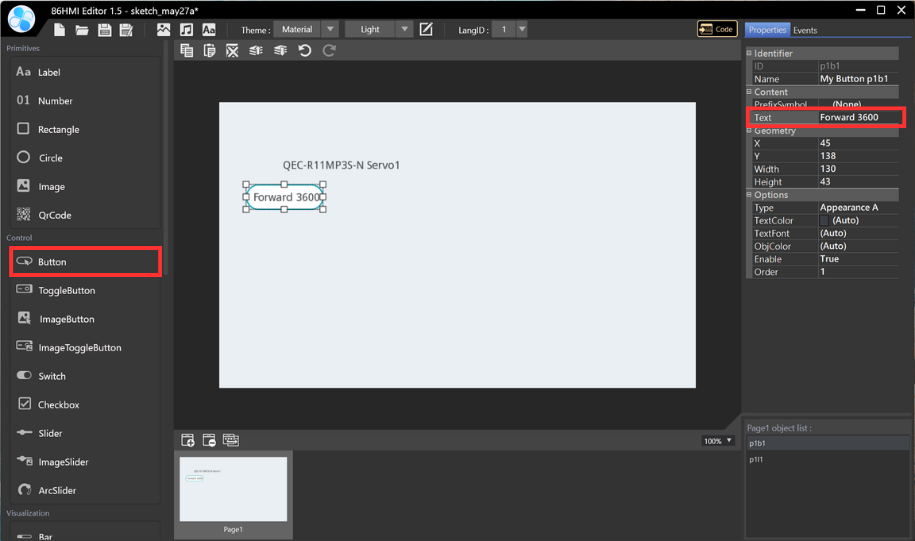
  4. Add control button: Button (p1b1) > Edit the button text (Type the text inside the field)
    Stepper Motor Control Example tips_pic
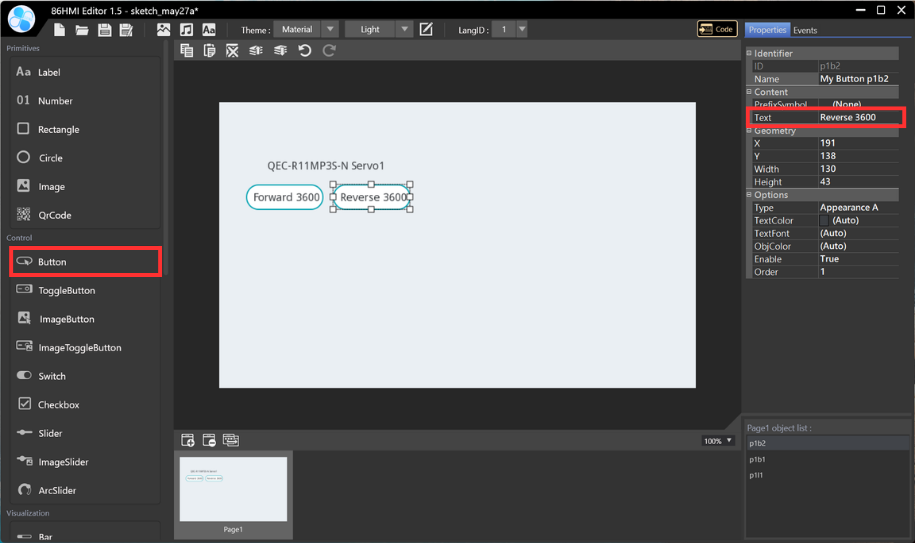
  5. Add control button: Button (p1b2) > Edit the button text (Type the text inside the field)
    Stepper Motor Control Example tips_pic
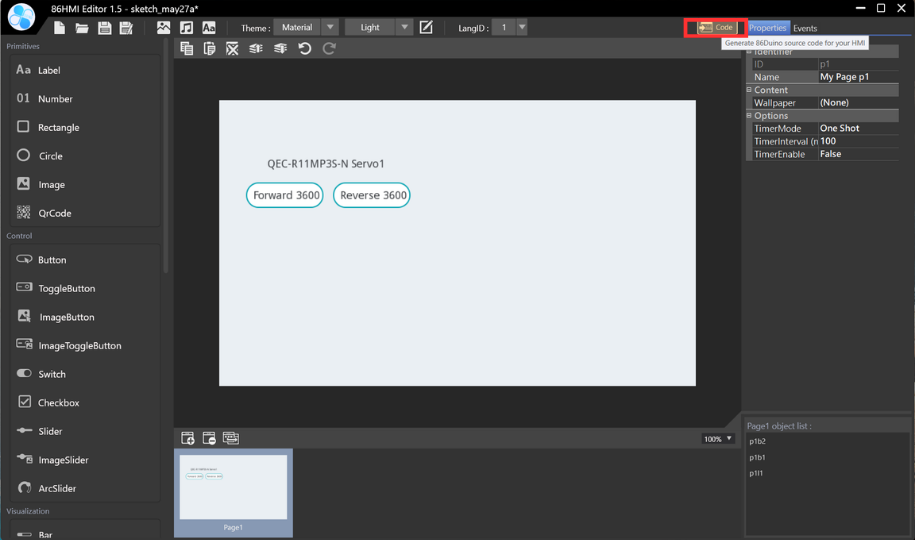
  6. 上傳以產生範例內容
    Stepper Motor Control Example tips_pic

步驟 3 – ArduBlock 程式設計

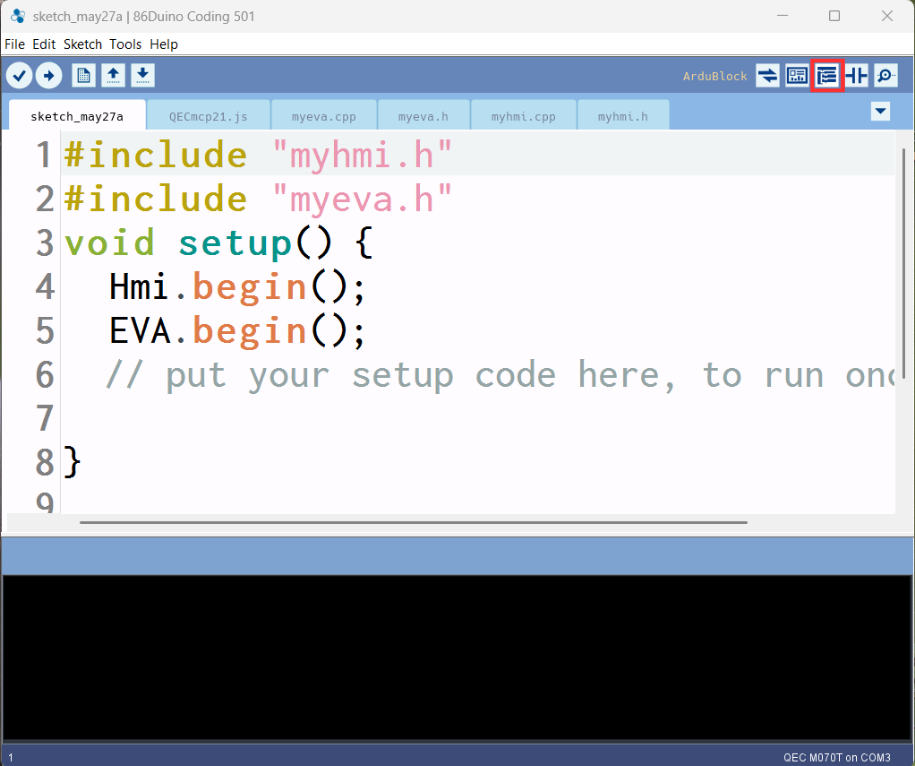
  1. 點擊 ArduBlock 工具
    Stepper Motor Control Example tips_pic
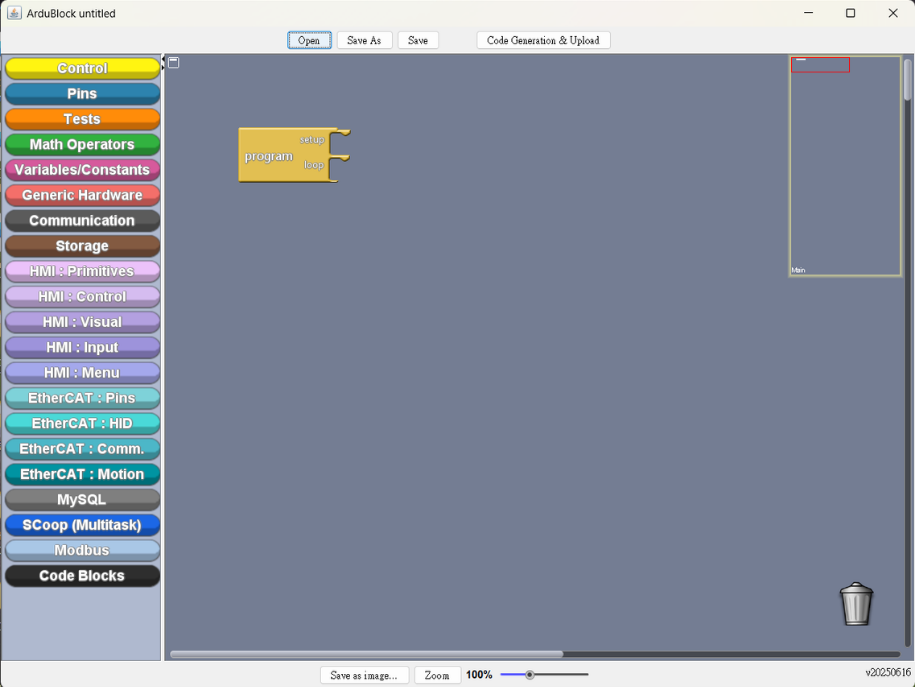
  2. ArduBlock 工作區
    Stepper Motor Control Example tips_pic
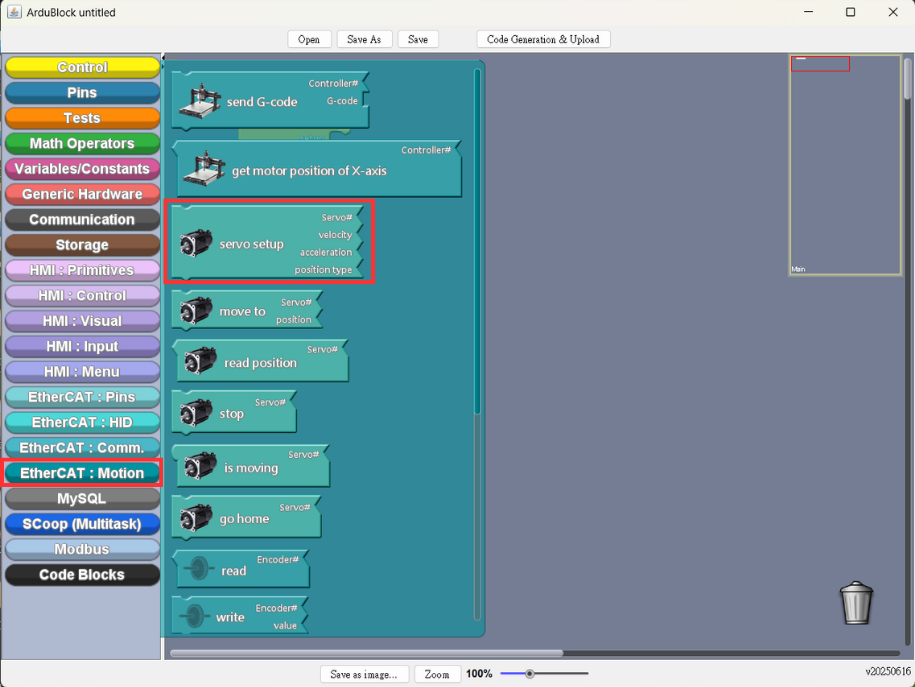
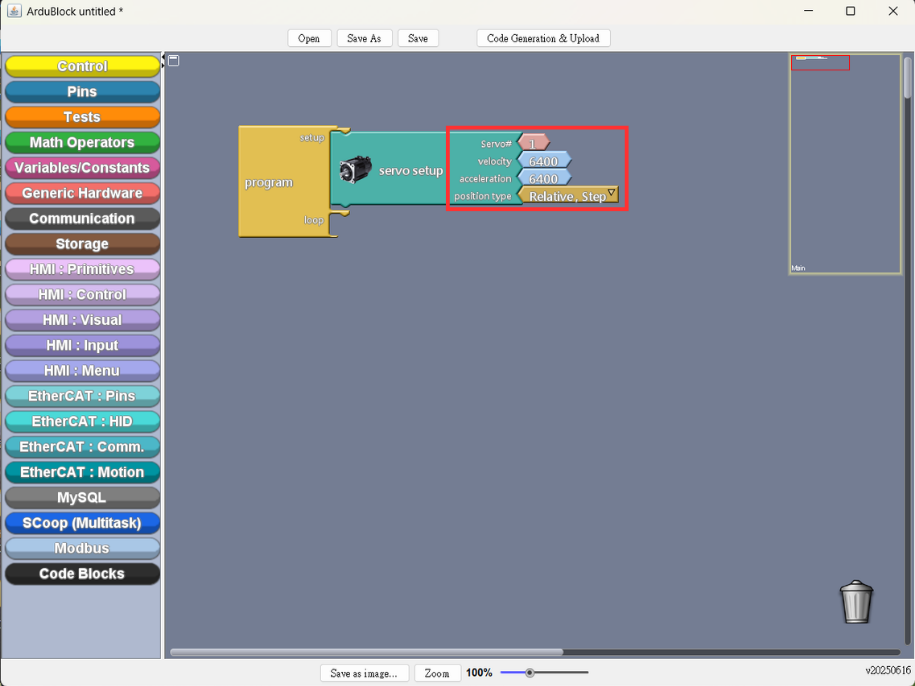
  3. EtheCAT Motion Setup: EtherCAT.Motion > servo setup
    Stepper Motor Control Example tips_pic
  4. Setting the parameter (As shown in the illustration)
    Stepper Motor Control Example tips_pic
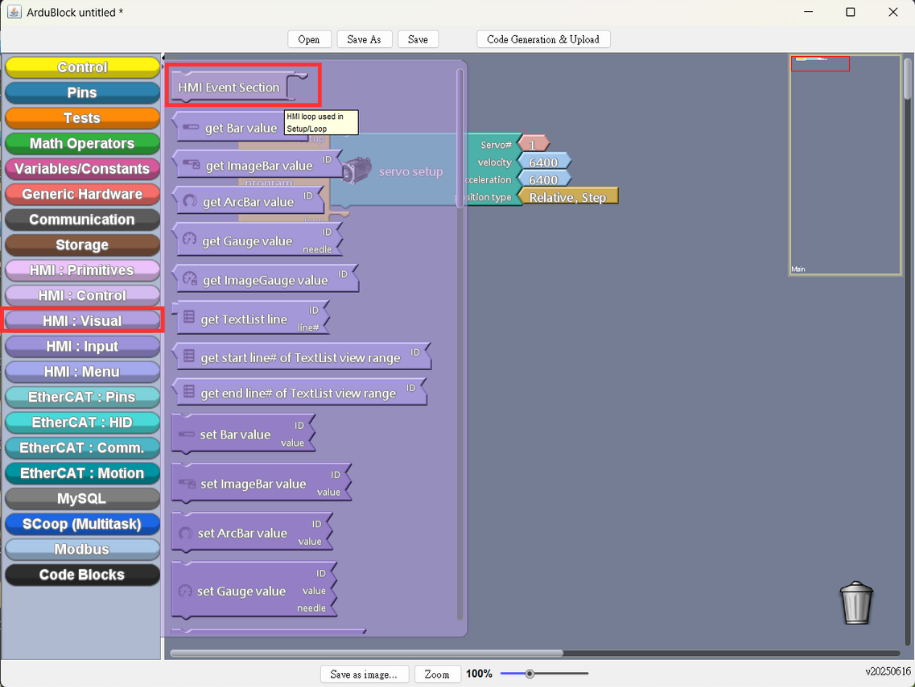
  5. Add HMI Visual Block: HMI.Visual > HMI Event Section
    Stepper Motor Control Example tips_pic
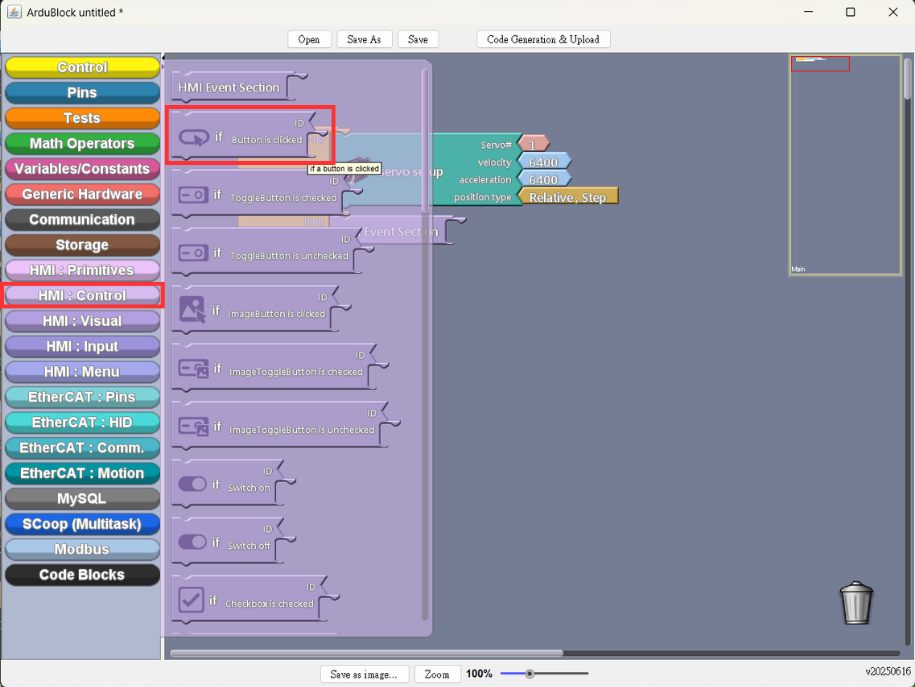
  6. Add Control Button: HMI.Control > if Button is clicked
    Stepper Motor Control Example tips_pic
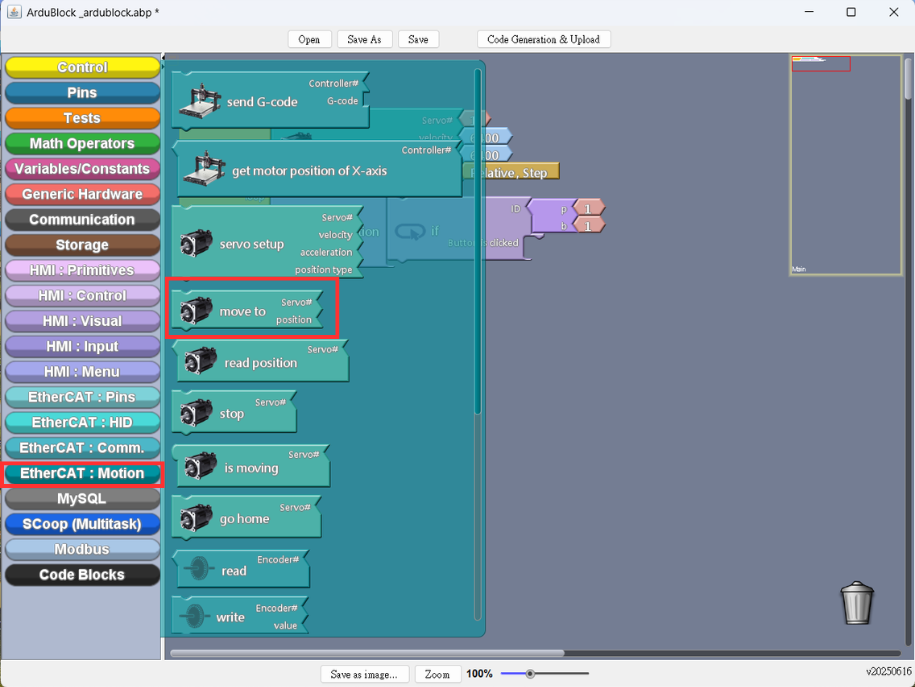
  7. EtheCAT Motion Setup: add move to block
    Stepper Motor Control Example tips_pic
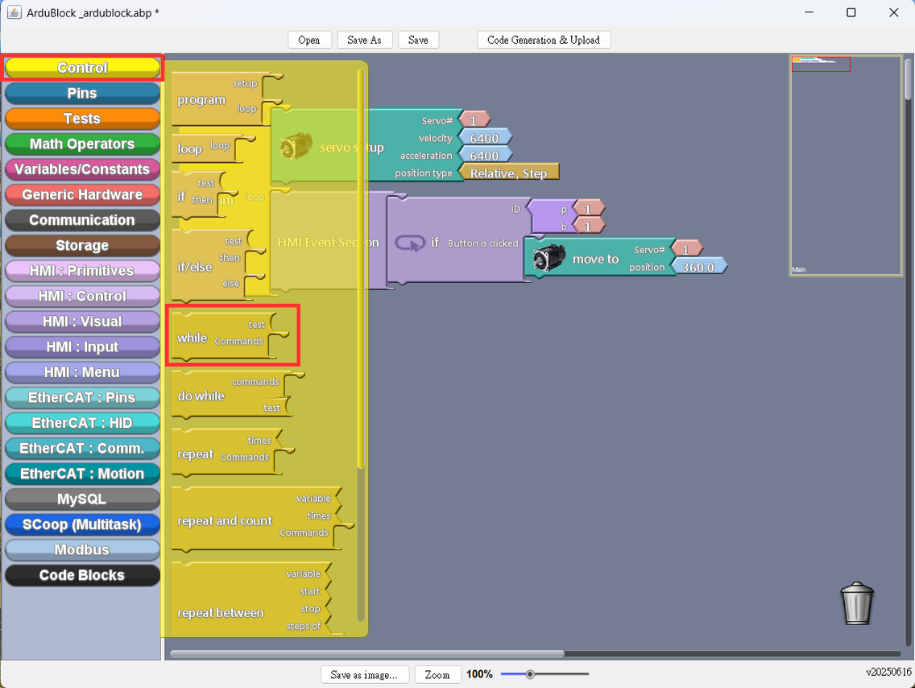
  8. Add Condition Block: while block
    Stepper Motor Control Example tips_pic
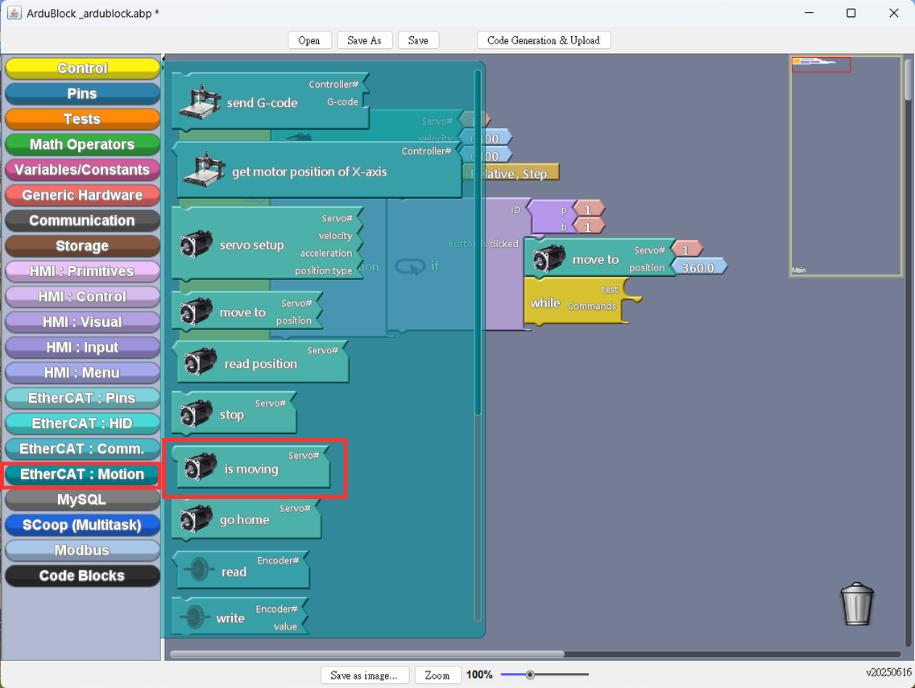
  9. EtheCAT Motion Setup: add is moving
    Stepper Motor Control Example tips_pic
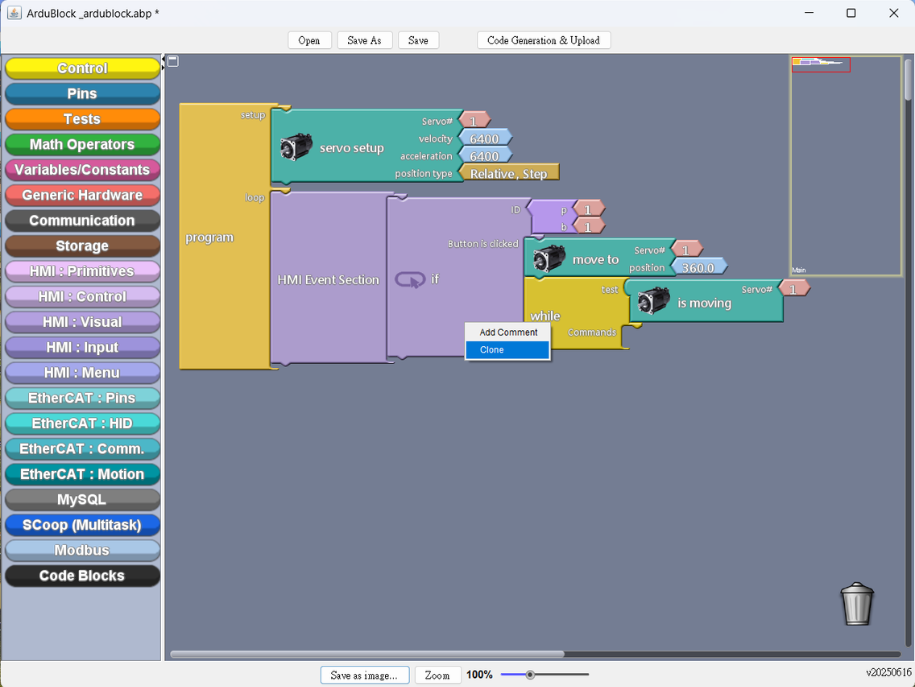
  10. Right-click to clone the whole control block (As shown in the illustration)
    Stepper Motor Control Example tips_pic
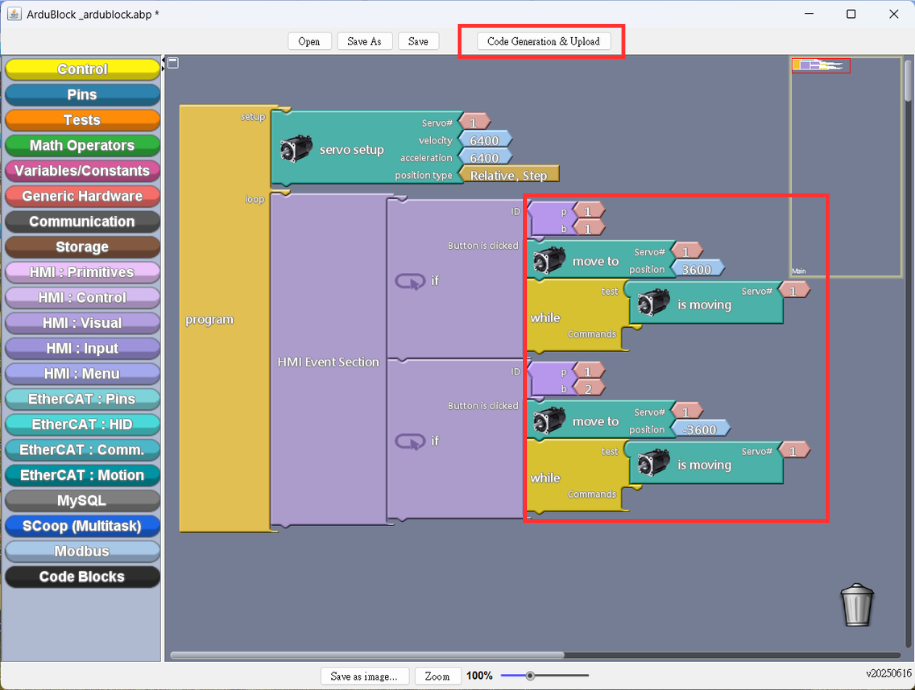
  11. Set up the parameters, and upload to Generate Example Content
    Stepper Motor Control Example tips_pic
  12. Save draft (Please select the folder where you want to save it)
    Stepper Motor Control Example tips_pic
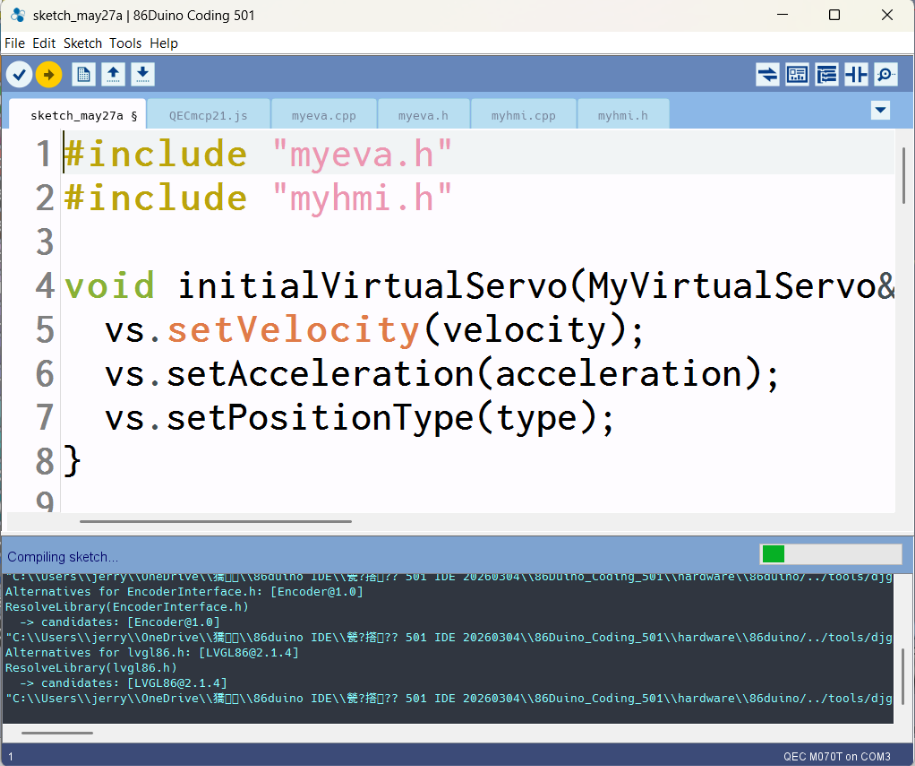
  13. Upload and compile the sketch
    Stepper Motor Control Example tips_pic

示範結果

  1. 結果呈現
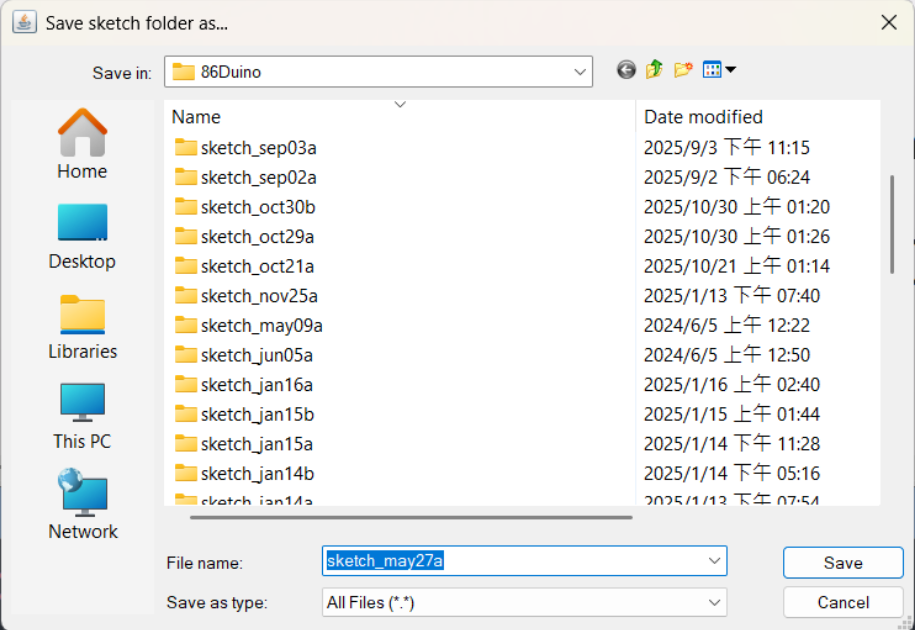
    Stepper Motor Control Example tips_pic

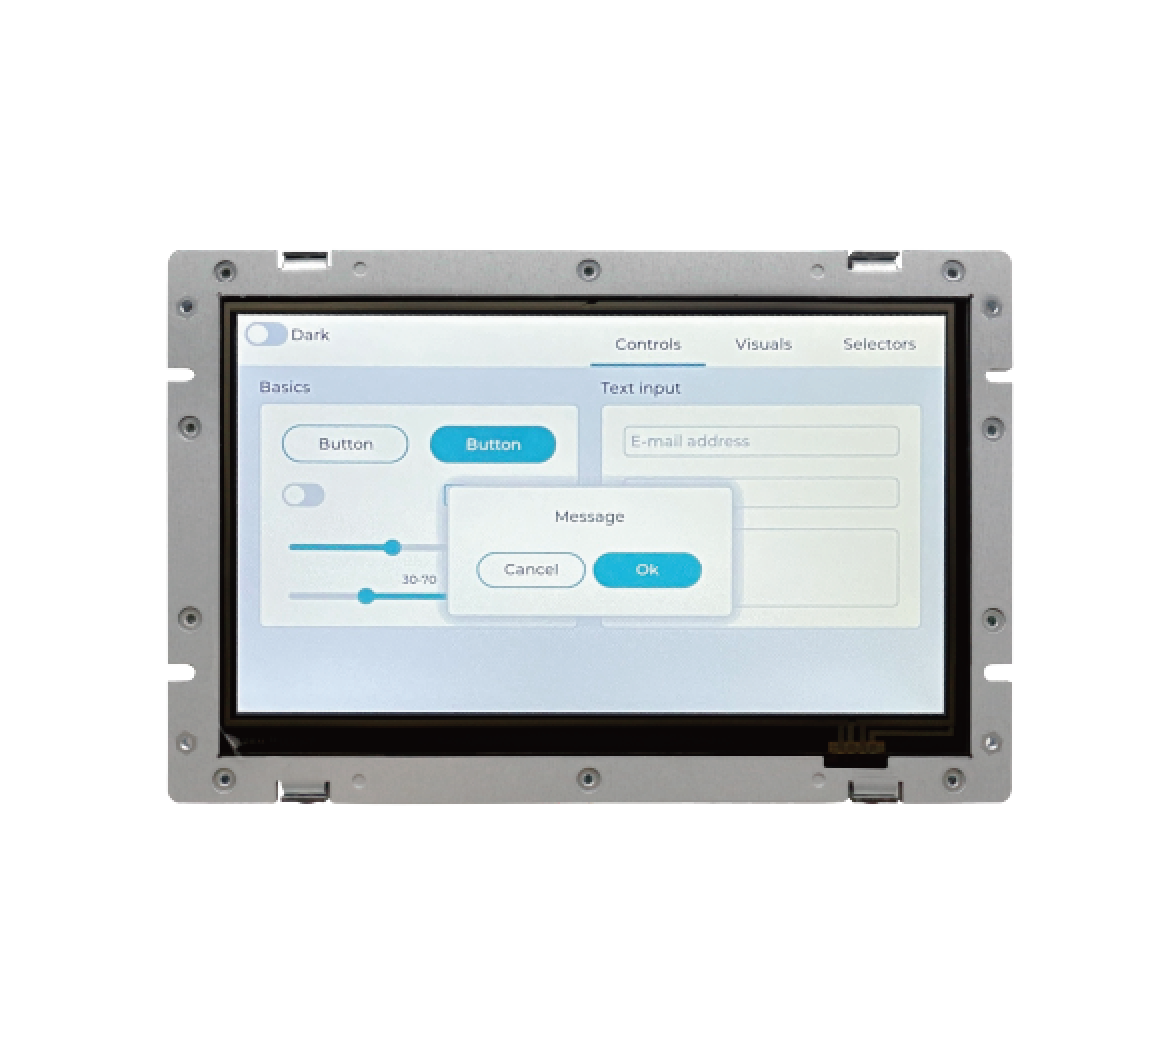
QEC-M-070T

產品特色 QEC-M-070T:

  • EtherCAT MDevice 開放式框架 7 吋 LCD
  • 基於即時雙核心 CPU 的整合式 EtherCAT MDevice
  • 86Duino 集成開發環境(IDE)
  • 7 吋 TFT LCD 螢幕,配備電阻式觸控螢幕(800×480)
  • 適用於人機介面 (HMI) 的高可靠性 SLC eMMC 儲存裝置,具備 HDMI 輸出功能
  • 工業運作溫度 -20 至 +70°C / -30 至 +85°C
  • 豐富的介面:3×LAN、3×USB、RS232/485、CAN、SPI、I2C、與 Arduino 相容的 GPIO
  • 內建電壓、溫度及系統狀態監控功能

QEC-RXXMP3S

產品特色 QEC-RXXMP3S:

  • 支援 CiA402 和 G-code 的驅動程式
  • 3 個步進馬達 (2 相雙極步進馬達)
  • 驅動電流最高 4.84A,峰值 5.0A (可由開關調整)
  • 編碼器介面 (A、B、Z),差分式
  • 馬達不動時自動降低電流
  • 內部監控硬件信息
  • EtherCAT 一致性測試工具通過驗證
  • 工作溫度 -20 至 +70 °C

如需更多資訊或索取樣品,請電郵至 info@icop.com.tw,聯絡您附近的 ICOP 分公司,或聯繫我們的 全球授權經銷商.

購物車
返回頂端